A Beginner's Guide to Cold Process Soap Making with Botanicals
Learn the essentials of natural soap making with botanicals in our comprehensive guide. Discover how to create beautiful handmade soaps using herbs, clays, and essential oils for a chemical-free alternative.
Kathrine-Anne Hill
6/28/202510 min read
By: Kathrine-Anne Hill
Introduction to Cold Process Soap Making
Cold process soap making is a traditional method of crafting soap that involves mixing oils with an alkali substance, typically sodium hydroxide, to initiate a chemical reaction known as saponification. This technique allows for greater control over the final product, resulting in high-quality soap that retains the natural properties of its ingredients. Unlike hot process methods, which involve heating the mixture, cold process soap making operates at room temperature, preserving the essential qualities of the botanicals and fragrances incorporated into the soap.
One of the primary benefits of making soap at home using the cold process is the ability to customize each batch to suit individual preferences. Hobbyists can experiment with various oils, essential oils, and additives such as herbs, spices, and even natural colorants. This level of personalization not only enhances the aesthetic appeal but also caters to specific skin types and sensitivities. Additionally, making soap at home offers an opportunity to avoid synthetic chemicals and preservatives commonly found in commercial products.
The history of soap making dates back thousands of years, with the earliest records originating from ancient Babylon, where fats and ashes were combined to create a crude form of soap. Over the centuries, various cultures have refined the process and developed unique soap-making techniques that incorporate local botanicals and natural ingredients. Cold process soap making, in particular, has gained popularity in recent years due to the growing interest in natural and sustainable living practices.
In summary, cold process soap making provides a unique and satisfying method for crafting high-quality personal care products. With its roots deeply embedded in history, this practice continues to thrive, inviting new generations to explore the art of soap crafting and the joy of customizing their skincare routine with various botanical ingredients.
Essential Tools and Ingredients
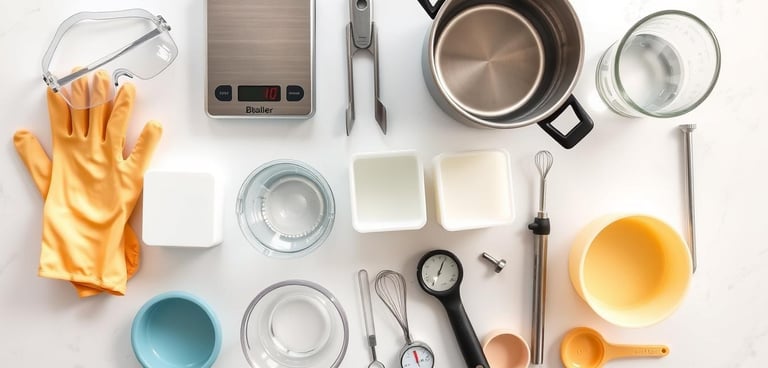
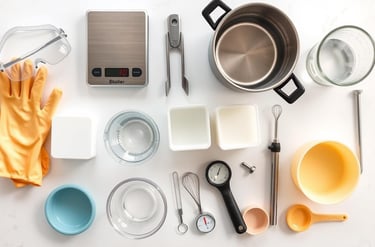
To successfully embark on the journey of cold process soap making, it is crucial to gather all necessary tools and ingredients. This ensures not only efficiency but also safety during the soap production process. One of the most important items on your list is personal protective equipment (PPE). Wearing safety goggles and gloves is essential whenever handling lye, a caustic substance that can cause serious burns. Additionally, a long-sleeved shirt and closed-toe shoes will protect your skin from any accidental splashes.
Next, you will need mixing tools. A heat-resistant container, preferably made of glass or stainless steel, is required for mixing lye and water. It is advisable to use a stick blender for emulsifying oils and lye into a smooth mixture. Silicone spatulas are beneficial for scraping the sides of your container and ensuring that all ingredients are well combined. A kitchen scale is indispensable for accurately measuring oils, lye, and water, as precise measurements are vital in soap making.
When it comes to molds, there are various types available, including silicone molds, loaf molds, and individual cavity molds. Silicone molds are particularly user-friendly as they allow for easy removal of the finished soap. If you choose a rigid mold, ensure it is adequately lined to prevent sticking. Lastly, the primary ingredients needed for cold process soap making include oils such as olive, coconut, and palm oils, each contributing unique properties to the final product. Lye, or sodium hydroxide, is another essential ingredient, as it facilitates the saponification process, converting oils into soap. By understanding the importance of each tool and ingredient, you can set yourself up for a successful soap-making experience while prioritizing safety at every stage.
Safety Equipment
Safety goggles
Chemical-resistant gloves
Long-sleeved clothing
Apron
Well-ventilated workspace
Soap Making Tools
Digital kitchen scale (for precise measurements)
Stainless steel pot (never aluminum)
Heat-resistant containers for lye solution
Silicone molds or wooden mold with liner
Immersion blender
Thermometer
Silicone spatulas and spoons
Measuring cups (for initial organization)
Understanding Saponification
Saponification is the fundamental chemical process by which fats and oils are converted into soap through the reaction with alkali, typically sodium hydroxide or lye. This reaction not only transforms triglycerides into soap molecules but also produces glycerin as a byproduct. Understanding saponification is essential for anyone engaging in cold process soap making, as proper execution of this process ensures the safety and effectiveness of the final product.
The saponification process begins when lye is mixed with water, creating a caustic solution. When this solution is combined with fats or oils, the hydroxide ions from the lye react with the fatty acids in the fats. This reaction requires precise ratios of oils to lye; hence, measuring is critical. The exact amount of lye needed varies depending on the types of fats used, as each fat has a unique saponification value. This value indicates the amount of lye required to fully saponify a specific weight of fat.
To successfully calculate these ratios, soap makers often utilize a lye calculator. These online tools allow users to input the types and amounts of oils they intend to use, providing the recommended amount of lye necessary for complete saponification. It is paramount to ensure that all lye is completely reacted with the fats to guarantee consumer safety and ensure that the soap is non-irritating and gentle on the skin.
Moreover, leaving unreacted lye in soap can result in a hazardous product, potentially causing burns or skin irritation. To prevent such outcomes, stick to the calculated lye amount and always conduct saponification under safe conditions. Understanding the science behind saponification empowers beginners to create high-quality handmade soap that is both effective and safe for use.
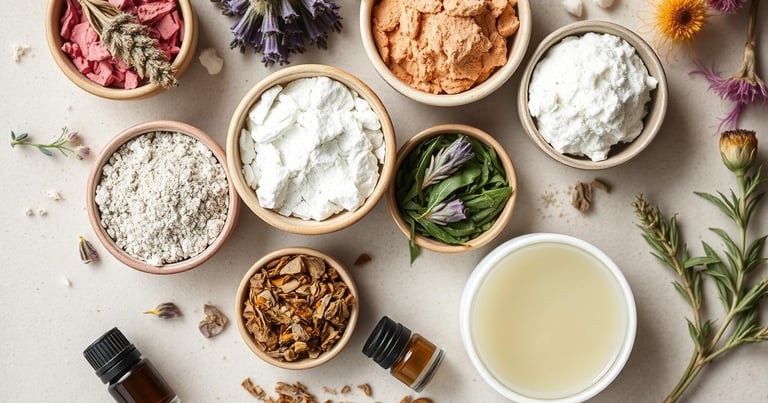
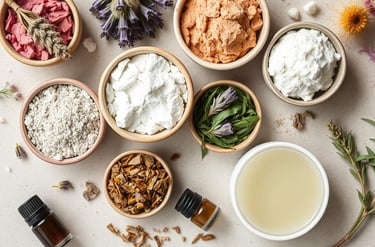
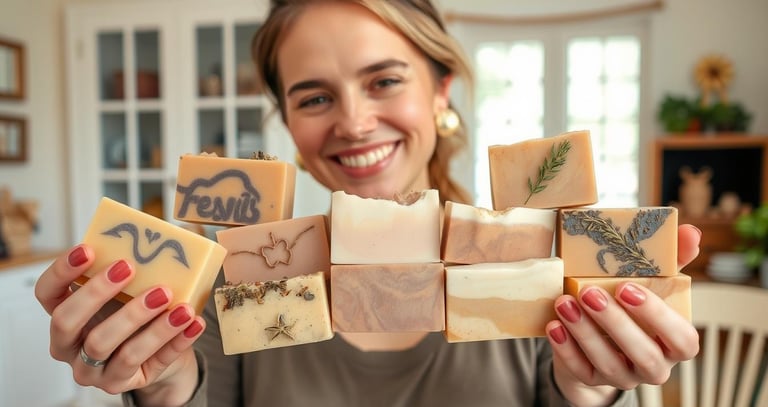
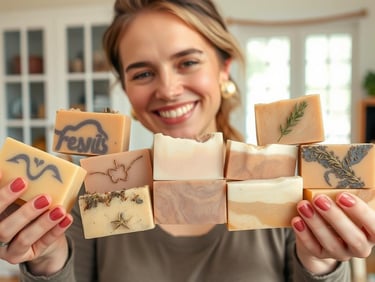
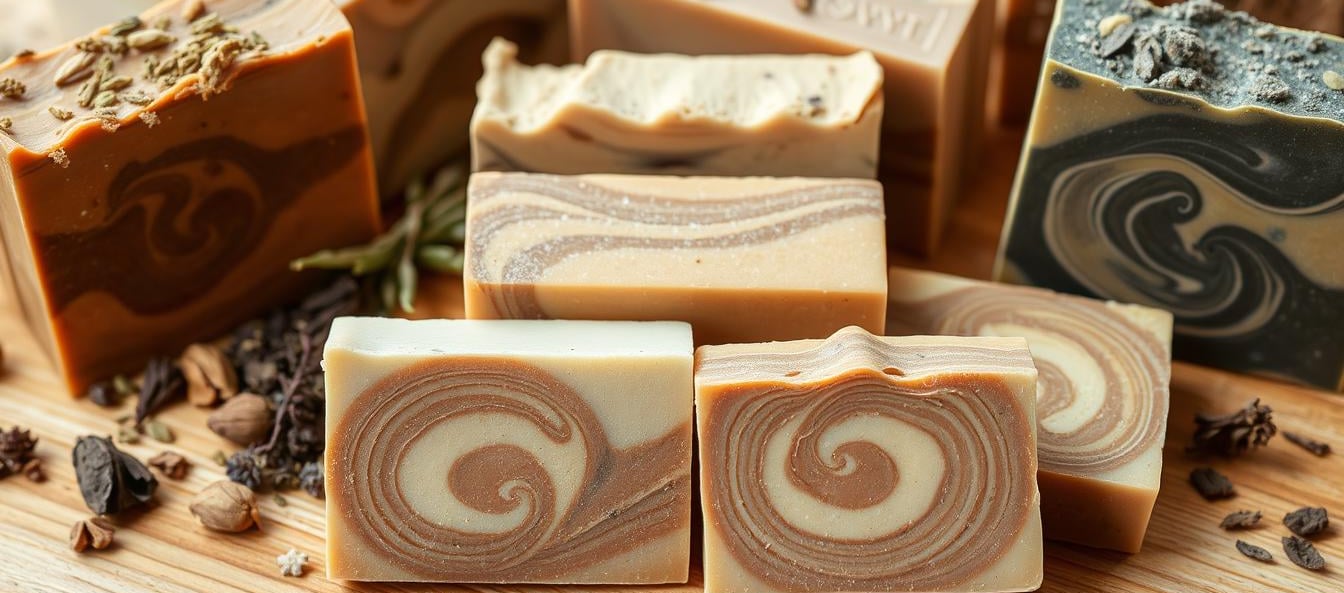
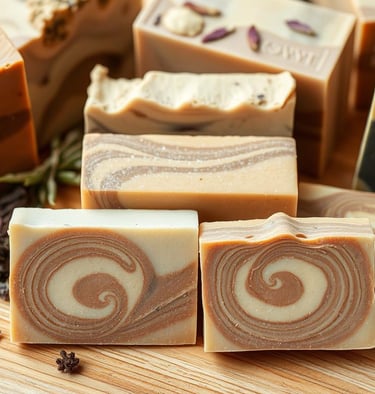
Incorporating Botanicals into Soap
The integration of botanicals in cold process soap making not only elevates the aesthetic appeal of the final product but also enhances its functional properties. Botanicals such as dried herbs, flowers, and essential oils have become popular among soap makers seeking to imbue their creations with natural scents and therapeutic benefits. When selecting the right botanicals, one must consider their compatibility with the saponification process. Certain materials can react adversely, leading to undesirable effects on both texture and scent.
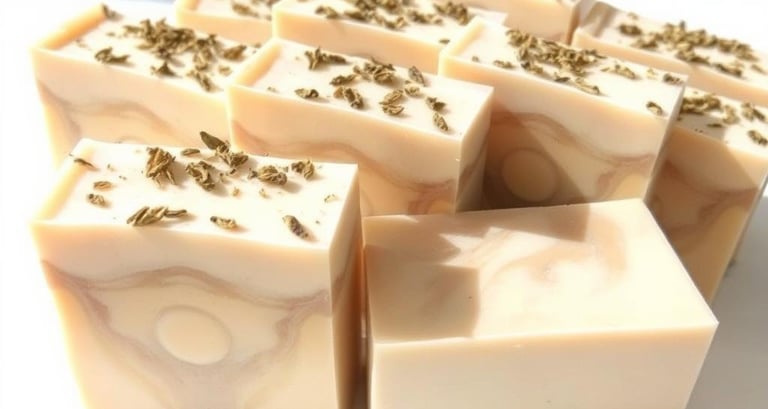
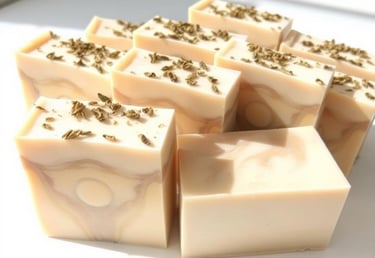
One effective approach is to use dried herbs and flowers. Common choices include lavender, chamomile, and calendula, which can provide a visually pleasing appearance as well as possible skin benefits. It is advisable to finely grind these botanicals to ensure an even distribution throughout the soap, preventing clumping. Moreover, a general guideline is to incorporate about one tablespoon of dried herbs or flowers per pound of soap. However, it is essential to conduct small test batches to ascertain how the botanicals impact the final product.
Essential oils also deserve attention, as they not only impart fragrance but may also add skin-loving properties. When adding essential oils, one must be mindful of the maximum usage rate, typically recommended between 0.5% to 5% of the total weight of oils used in a batch. This ratio ensures that the essential oils do not overpower the soap's composition or hinder the saponification reaction. Combining essential oils with specific botanicals can further enhance the fragrance profile, offering a harmonious blend that appeals to the senses.
In addition to enhancing scent and visual appeal, botanicals can affect the lather and texture of the soap. Testing different combinations will provide insights into how each botanical influences the soap, allowing for more tailored formulations. Through careful selection and formulation, incorporating botanicals can create a unique cold process soap that aligns with both aesthetic desires and functional benefits.Working with Herbs
Fresh vs. Dried Herbs
While dried herbs are generally preferred for soap making, some fresh herbs can be used as well. Fresh herbs should be finely chopped and used in small amounts to prevent browning and spoilage. Dried herbs can be used as colorants, exfoliants, or decorative elements.
Popular Herbs for Soap
Lavender - Soothing, aromatic, and visually appealing
Calendula - Gentle, skin-loving, and adds golden color
Chamomile - Calming and adds subtle yellow tones
Rosemary - Stimulating and adds natural antioxidants
Peppermint - Refreshing and invigorating
Herb Preparation Methods
Infusions - Steeping herbs in oils before soap making
Powders - Ground dried herbs for color and texture
Whole pieces - For decorative tops and exfoliation
Tea infusions - Using strong herbal tea instead of water
For the most vibrant colors from herbs, infuse them in your soap oils for 4-6 weeks before making your soap. This extracts both color and beneficial properties.
Incorporating Clays
Natural clays add color, texture, and skin benefits to your soap. They can help draw impurities from the skin while providing gentle exfoliation. Different clays offer different properties and colors:
Kaolin Clay (White) - Gentle for sensitive skin
French Green Clay - Detoxifying, adds forest green color
Pink Clay - Mild, good for dry or mature skin
Bentonite Clay - Highly absorbent, good for oily skin
Rhassoul Clay - Mineral-rich, adds brown tones
Using Clay in Soap
To incorporate clay into your soap:
Use 1-2 teaspoons of clay per pound of oils
Disperse clay in a small amount of water before adding
Alternatively, mix directly into oils before adding lye
For stronger colors, increase the amount gradually
Consider using clays with complementary properties for your skin type
Simple Cold Process Soap Recipe
Creating your own cold process soap can be a rewarding endeavor, allowing you to customize your products with botanicals. Below is a straightforward recipe for beginners that showcases the basic principles of cold process soap making.
Ingredients:
16 oz. olive oil
16 oz. coconut oil
16 oz. palm oil
12 oz. distilled water
4.8 oz. sodium hydroxide (lye)
Essential oils of choice (optional, approx. 2 oz.)
Botanicals for decoration (e.g., dried lavender, calendula petals)
Instructions:
Measure the distilled water into a heat-resistant container. Slowly add the lye to the water, stirring gently until dissolved. Be cautious, as this mixture will heat up and produce fumes. Allow it to cool to around 100-110°F.
In a separate pot, measure the olive oil, coconut oil, and palm oil. Heat the oils gently until they are completely melted and combined, then allow them to cool to a similar temperature as the lye solution.
When both the lye solution and the oils are within the desired temperature range, slowly pour the lye solution into the oils while stirring continuously. Use a stick blender to mix until you reach "trace," which is when the mixture has thickened and leaves a trail when drizzled.
If using essential oils, add them at this stage and mix thoroughly. Additionally, incorporate any botanicals you wish to include into the soap base.
Pour the soap mixture into prepared molds, smoothing the top with a spatula. Sprinkle additional botanicals on top for decoration.
Cover the molds with a towel or plastic wrap to insulate them as they saponify. Allow the soap to sit for 24-48 hours until it hardens sufficiently to be unmolded.
Once unmolded, cut the soap into bars and allow them to cure for 4-6 weeks before use.
This simple recipe provides a reliable foundation for beginners looking to explore the art of cold process soap making. Alongside this recipe, experimentation with various oils, scents, and botanicals can lead to unique, personalized creations.
Curing and Storing Your Soap
The cold process soap-making technique provides artisans with a unique opportunity to create high-quality soap bars infused with botanicals. Once the soap mixture has been poured into molds and allowed to set, the next crucial step is curing. This phase typically lasts four to six weeks, a duration that varies depending on the specific recipe and environmental conditions.
Curing is essential as it allows the soap to undergo a chemical process known as saponification, where oils and lye react to create a mild, safe product. This process not only ensures that the soap is fully formed but also significantly enhances its texture and longevity. Proper curing can lead to a bar that produces a stable lather, maintains its fragrance, and retains the benefits of the botanicals used. Without adequate curing, one may end up with soft, unuseable soap which can irritate the skin.
Once your soap has completed the curing process, storing it correctly becomes vital to maintaining its quality. Ideally, soap bars should be stored in a cool, dry place away from direct sunlight. Utilizing natural materials like wood or cardboard boxes can help absorb moisture and allow for air circulation. Avoid plastic containers, as they can trap humidity and lead to mold growth or degradation of the soap’s quality.
Ready to Master Natural Soapmaking?
Take your soap making skills to the next level with our comprehensive guide, "Pure and Simple: Making Natural Soap at Home". This book walks you through every step of the natural soap making process with detailed instructions, troubleshooting tips, and 12 tested recipes for beginners to advanced crafters.
Learn how to safely work with lye, select the perfect oils for your skin type, and create stunning designs using natural colorants. The book includes special sections on incorporating herbs, clays, and essential oils for therapeutic benefits.
For optimal longevity, avoid exposing your soap to extreme temperatures and humidity levels. If you notice any issues such as a rancid smell or discoloration, it might indicate improper curing or storage conditions. In such cases, reassessing your curing environment or storage method will be necessary to prevent degradation. Following these guidelines will not only help maintain the aesthetic appeal of your soap but also ensure it remains a beneficial addition to personal care routines for an extended period.
Conclusion and Next Steps
In the world of cold process soap making, experimenting with various botanicals and techniques can be both an enjoyable and an enriching experience. Throughout this guide, we have discussed the fundamental principles of crafting soap using the cold process method, highlighting the importance of proper safety measures, ingredient selection, and the role of botanicals in enhancing the aesthetic and sensory qualities of your soap creations.
As you embark on your soap-making journey, remember that practice is key to mastering this art. Start by approaching simple recipes before gradually advancing to more complex formulations. Consider experimenting with different botanical additives, such as herbs, essential oils, and natural colorants, to discover unique combinations that resonate with your personal preferences. Each variation can provide you with distinctive textures, scents, and visual appeal, ultimately leading to a tailored product that reflects your creativity.
Furthermore, the soap-making community is vast and supportive, so take advantage of the various resources available to enhance your skills. Online forums, workshops, and instructional videos can guide you through more advanced techniques and help you troubleshoot any challenges you may encounter along the way. Additionally, numerous books are dedicated to the art of soap making, detailing advanced methods and extensive recipes that can further deepen your understanding.
As you hone your craft, we encourage you to share your creations with friends, family, and fellow enthusiasts. Documenting your projects not only fosters a sense of accomplishment but also allows you to engage with others who share your passion for soap making. By exchanging ideas and experiences, you can broaden your knowledge and continuously improve your skills. Embrace the journey ahead, and may your adventures in cold process soap making lead to beautiful and rewarding results.